Date Pinwheel Cookies

A FAMILY CHRISTMAS CLASSIC- Date Pinwheel Cookies
first published 12/16/14; last updated 12/23/24
When it comes to holiday baking Date Pinwheel Cookies are right up there at the top of my list as a forever favorite. Like many of the recipes I share, these date pinwheel cookies are a recipe that my family has been making for years. And for all those years they've stayed firmly planted at the top of my list of favorite Christmas cookies, right between Russian Tea Cakes and Rum Balls. In fact, it doesn’t quite feel like Christmas without them.
People often joke these days about when they Google a recipe, they just want the recipe, not to have to scroll through a million ads and read someone’s entire life story of how a recipe came to be through someone’s great grandmother’s sisters second cousin. Like get to the point already. We just want to cook, not read. And I get it, I really do. Most days I just want the recipe, too. But today is not one of those days. And this post is not for the “just here for the recipe” kind of crowd.
Not that I have a whole fancy story of how this date pinwheel recipe came to be. In fact, it’s not like this recipe is even unique to my family alone. It’s a classic, old school cookie that I believe was quite common during the prime of my Grandma’s generation.
However, this is where the life story bit comes in. Brace yourselves. You see my Nana wasn’t much of a baker. She was an outstanding cook and she made a pretty darn good pie. But my Great Aunt Lucy (Nan’s sister) was really the baker of the family and who I blame for my sweet tooth and love of baked goods to this day. So suffice it to say, Nan wasn’t whipping up all sorts of festive cookies come the holidays. However, there was one that I always remember her making and loving. Date Pinwheel Cookies. A simple festive cookie with a decadent caramel-like date swirl. They were fragrant and warm and comforting and oh so delicious. And to me, along with Russian Tea Cakes and Rum Balls, they signified Christmas.
I fondly remember being around Nan’s kitchen table as we made them. And then I remember them filling the old cookie tins (you know the tins, the ones that usually became sewing boxes) that would be kept out on the back porch for after meals and sharing with others (or, in my case, sneaking a cookie whenever I thought no one was looking). As I got older and we moved away, we kept the tradition alive, still making date pinwheels every year, and to this day, it still doesn’t feel like Christmas without them. And despite the fact that they’re considered old school and vintage, they’ll always be a classic to me because they’ll always remind me of Christmas time with Nan.
Outside of the nostalgia factor, Date Pinwheel Cookies are also a very visually appealing treat that are perfecting for adding something special to any dessert table. With their striking spiral design and the perfect balance of sweetness and texture, these cookies are sure to impress friends, family, and guests alike. Whether you're a baking novice or a seasoned pro, this recipe is easy to follow and guaranteed to delight. Trust me, if my Grandma could bake them so can you. The sweet, rich flavor of dates combined with a buttery, melt-in-your-mouth cookie dough is a winning combination that’s perfect for any occasion and it's hard not to put these at the top of a favorites list. Go on. I dare you.
So yeah, how’s that for a sappy little family recipe history story?!
And don’t worry. For all the “I’m just here for the recipe” people, I’ve got you. Just keep scrolling because I’m promise in this post I’m sharing my family’s exact date pinwheel cookie recipe and we’ll also dive into everything you need to know about making these irresistible cookies, from their origins (outside my Grandma’s kitchen ha) to the perfect recipe (obviously my Grandma’s recipe, not that I’m biased or anything). So, gather your ingredients, get your dates ready, roll up your sleeves, and prepare to enjoy the delightful process of baking these gorgeous and tasty cookies. Happy baking!
The Perfect Date Pinwheel Cookie Recipe
What Are Date Pinwheel Cookies?
Date Pinwheel Cookies are a type of rolled cookie, featuring a spiral of rich, sweet dates that contrast beautifully with a buttery, soft cookie dough. The result is a two-tone spiraled cookie that’s not only delicious but also visually appealing. The combination of the nutty, caramel-like flavor of dates with the tender, vanilla-flavored dough creates a perfect harmony that will leave everyone asking for more.
While I know these cookies as date pinwheels, thanks to their spiraled design, you might also see them referred to as "date swirl cookies" or "date rolls" depending on the region. Regardless of the name, one thing is certain – these cookies are a treat to be savored.
INGREDIENTS YOU NEED TO MAKE DATE PINWHEEL COOKIES
Here's everything you need! Measurements for each of the ingredients is included in the recipe card at the bottom of the post.
FOR THE Date Filling
DATES- I like to use medjool dates, which you should be able to find at your local grocery store, but you can use whatever is available and you prefer.
SUGAR- This helps to caramelize the dates
WATER- To help make the filling a more spreadable consistency
NUTS- For added flavor, texture and crunch. Be sure to finely chop the nuts so that you don’t have any issues when rolling up the cookies.
FOR THE Cookie Dough
UNSALTED BUTTER - For a rich and buttery dough;. I use unsalted butter so that I control the amount of salt in the recipe and make sure that it’s softened to room temperature before using.
FLOUR- I use all-purpose flour.
BAKING SODA- For leavening
SALT- To help balance some of the sweetness and enhance the overall flavor of the cookies.
BROWN SUGAR- For a slight molasses flavor that pairs beautifully with the dates, and also to help keep the cookies soft and moist.
EGG- To bind the dough and add extra moisture and richness
VANILLA EXTRACT- For flavor
The Benefits of Using Dates in Baking
Dates are the star ingredient in these cookies, and for good reason. Not only are they naturally sweet, making them a healthy alternative to refined sugars, but they also add a rich, caramel-like flavor that elevates any baked good. Packed with fiber, antioxidants, and essential minerals like potassium and magnesium, dates bring more than just flavor to the table. They also provide a boost of energy, making these cookies a more nutritious treat for you and your loved ones.
Equipment YOU NEED TO MAKE DATE PINWHEELS
Here are a few things that you may find useful when making this recipe:
STAND MIXER
For easy cookie dough mixing
SERRATED KNIFE
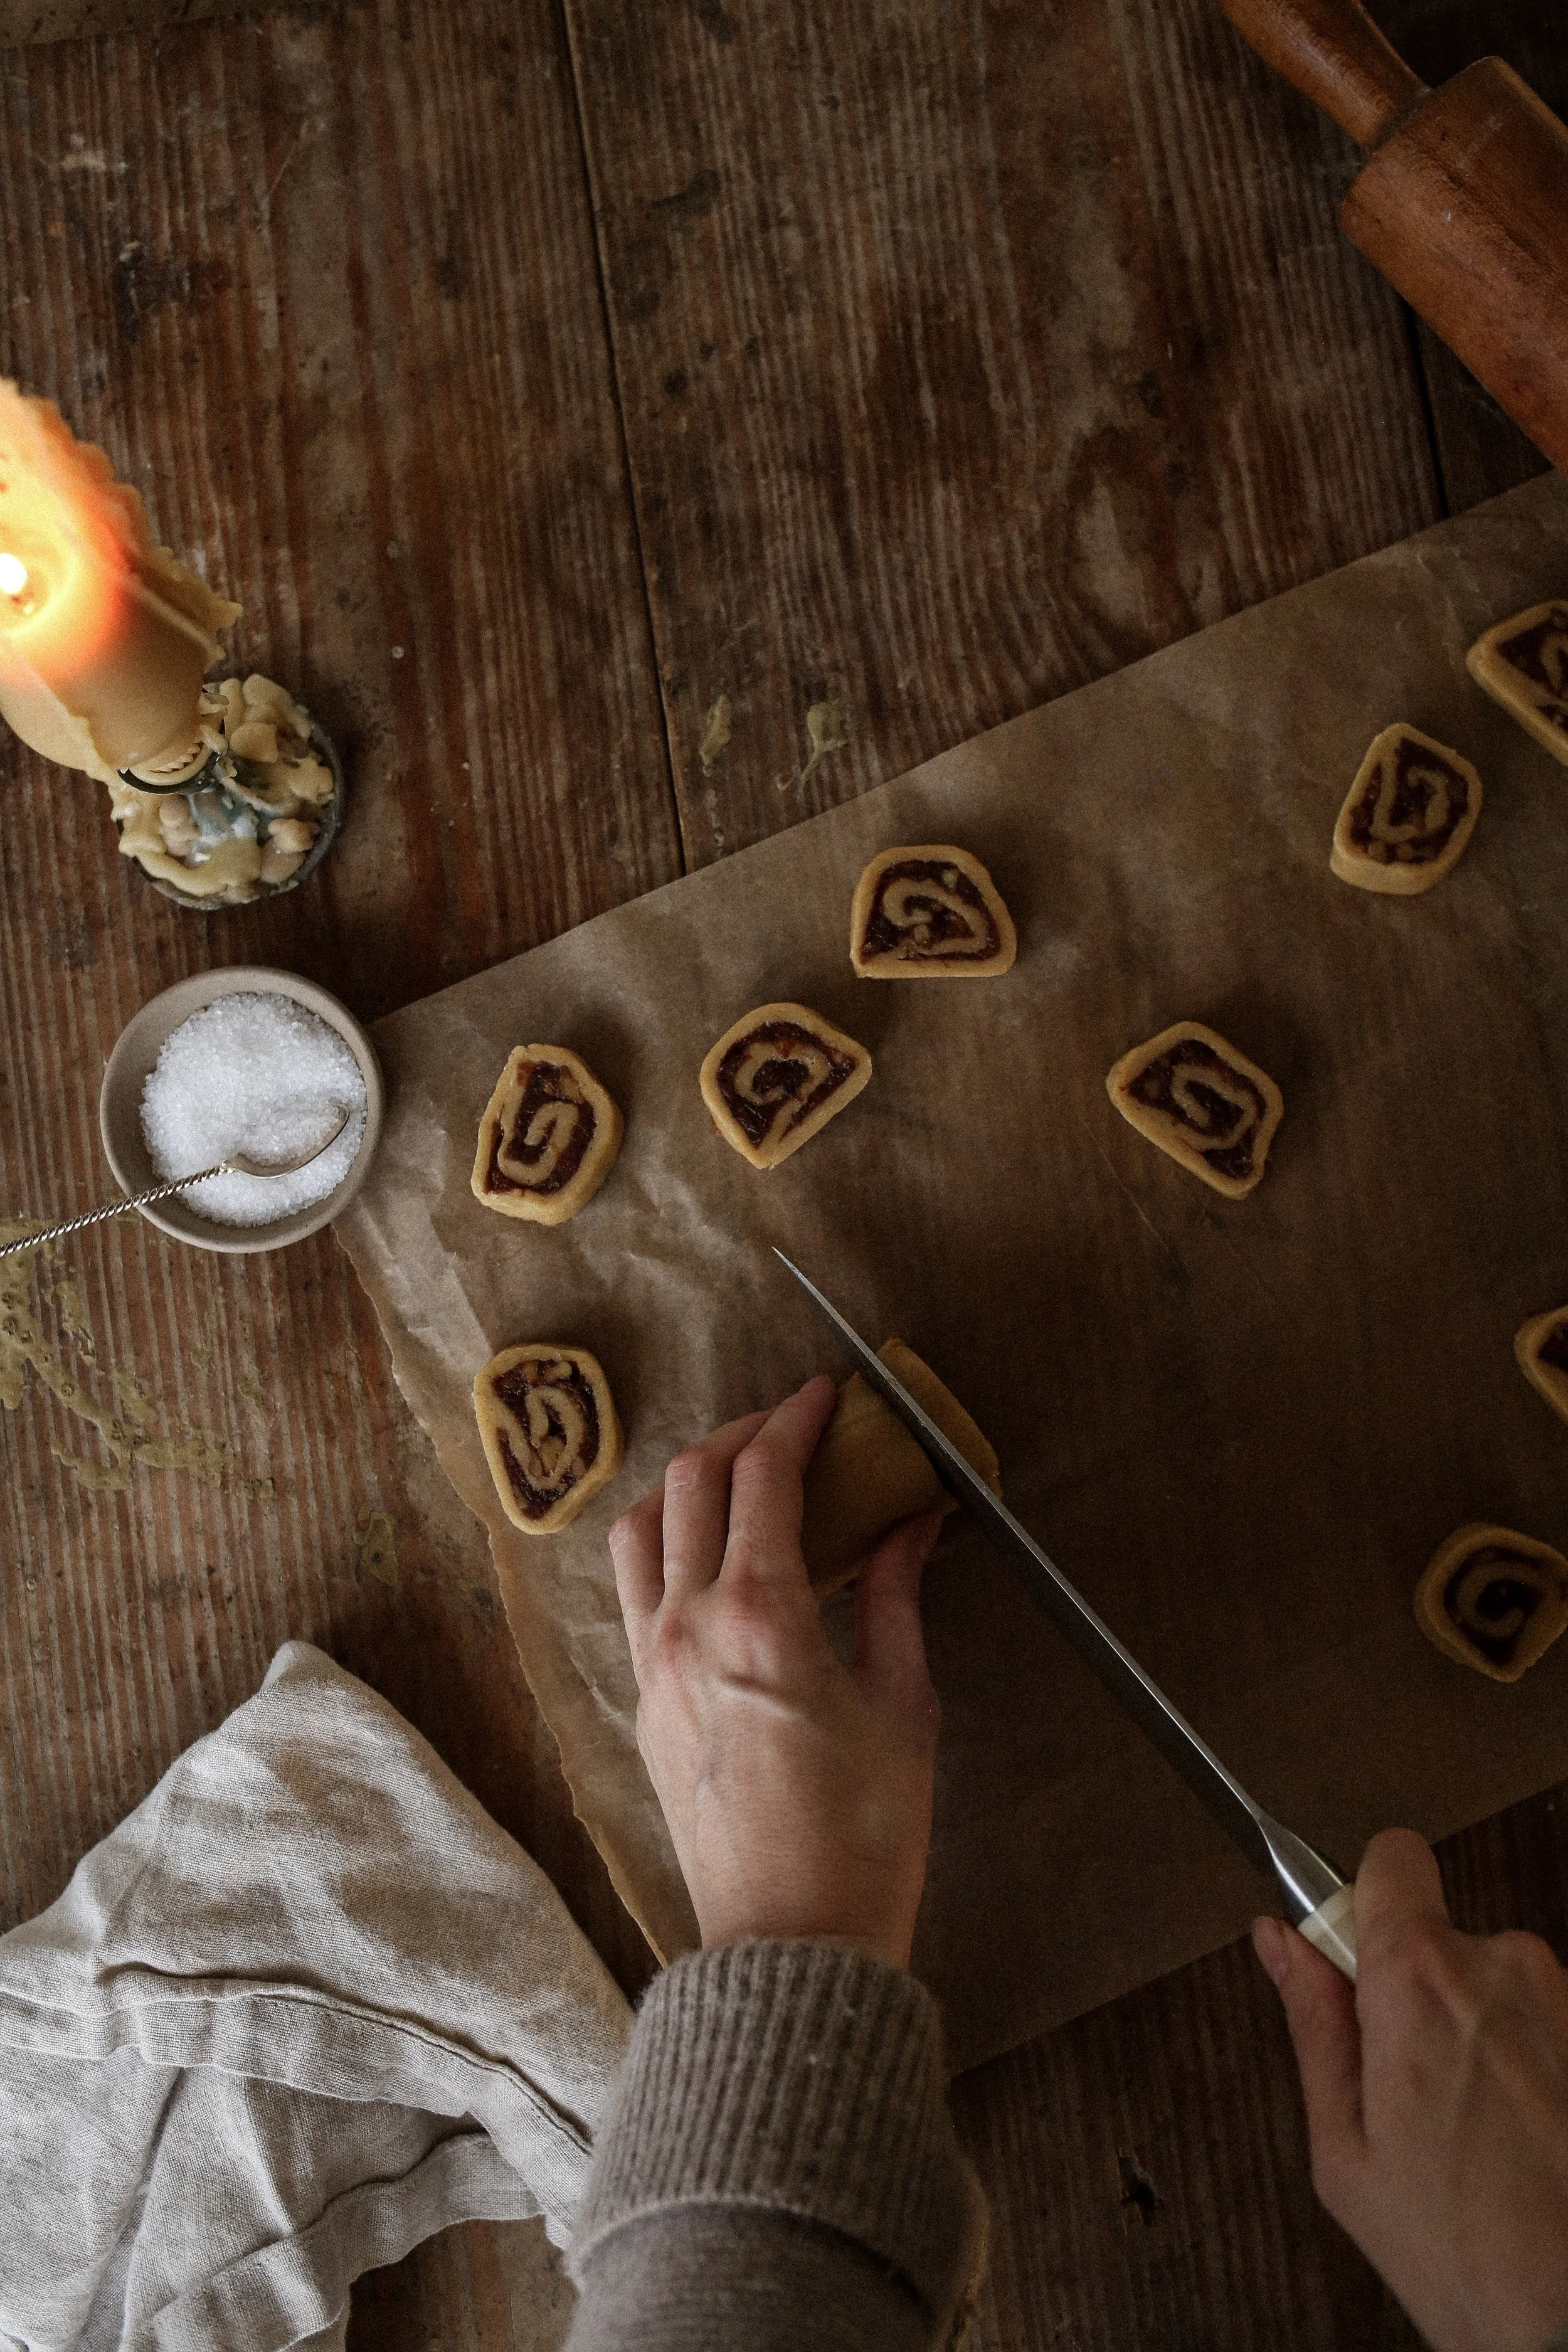
I found this works best for slicing the cookies, but any sharp knife will work.
PARCHMENT PAPER
I like to line my baking sheets with parchment paper to keep the cookies from sticking, but a silpat mat will also do the trick.
HOW TO MAKE DATE PINWHEEL COOKIES
Ready to bake up a batch of these tasty treats? Here’s a step-by-step recipe to guide you through the process. Be sure to start with the filling so that it has time to cool while you're making the cookie dough. Check the recipe card (at the bottom of the post) for more detailed instructions!
PREPARE THE DATE FILLING
The filling is a simple date mixture that gets cooked until it becomes a caramel-like paste and is then combined with chopped nuts (walnuts or pecans both work) for added texture and crunch.MAKE THE COOKIE DOUGH
No fancy steps, just your standard cookie dough procedure. Cream together the butter and sugar, add the vanilla and eggs then whisk the dry ingredients together before folding those in. The dough then gets a quick chill before moving onto the next step.ASSEMBLE THE PINWHEELS
Once the dough is chilled, roll it out, spread on the date mixture, then roll up the dough as if you were rolling up a jelly roll. Once rolled, wrap the dough in plastic wrap and refrigerate for at least 1 hour up to overnight.SLICE AND BAKE
When you’re ready to bake the cookies, simply slice the the dough into ¼-inch thick slices (I found a serrated knife works best for this) and bake until the edges of the cookies are lightly golden brown.ENJOY
Once your Date Pinwheel Cookies have cooled, they’re ready to enjoy!
Tips for Perfect Date Pinwheel Cookies
CHILL THE DOUGH
Chilling the dough before slicing is crucial for easy slicing and getting clean, even slices. It also helps the cookies hold their shape during baking. And don’t be tempted to skip the step of refrigerating the dough before rolling it out or it will be too soft and sticky to work with and it will be too hard to spread the date mixture onto it.
USE FRESH DATES
For the best flavor and texture, be sure your dates are soft and fresh. If your dates are too dry or hard, soak them in warm water for about 10 minutes to soften them before using.
FINELY CHOP THE NUTS
Make sure the nuts are very, VERY finely chopped. Otherwise it will be hard to incorporate them into the date filling and they will cause the dough to break when you’re rolling it up.
EXPERIMENT WITH ADD-INS
Feel free to add in spices (such as cinnamon, nutmeg or cardamom) or a bit of citrus zest to the date filling for extra flavor.
DATE FILLING TIPS
When you spread the date filling on to the rolled out cookie dough be sure to leave about a 1/2” border around the edge so that the filling won’t seep out of the pinwheels as you roll them up and then as they bake.
SIZE AND SHAPE
Slice the cookie dough log as evenly as possible so the cookies will be a uniform thickness and bake at the same rate. They may not be shaped perfectly so feel free to use your hands to round them out so they’ll be nice and pretty after they bake.
MAKE AHEAD TIPS
Once the dough is mixed it gets split in two portions before it’s chilled and then filled and rolled. If you prefer, you could freeze one of the portion of dough (either with or without the filling in in) and bake it up later. Wrapped well, the dough will keep three-five days in the refrigerator and up to three months in the freezer.
However, I don't suggest making the filling in advance as it will firm up in the refrigerator and you won't be able to spread it over your cookie dough!
STORAGE TIPS
Store cooled cookies in an airtight container. While I think the date pinwheels taste best within the first two days, they’ll keep for 4 to 5 days at room temperature, or you can keep them in the refrigerator for up to a week. For longer storage, place in single layers separated by parchment paper in a freezer-safe container and freeze for 2 to 3 months. Allow to defrost at room temperature before enjoying.
more christmas cookie recipes you’ll love
RUM BALLS- A boozy, chocolatey, no-bake treat
CHRISTMAS TREE SUGAR COOKIES- No refrigeration required
PIZZELLE COOKIES- An Italian classic
CAMPFIRE COOKIES- Loaded cookies that are slightly sweet, slightly smoky and no campfire is necessary (P.S. They also make a great cookie-mix-in-a-jar gifting option)
BECAUSE FOOD TASTES BETTER WHEN IT’S SHARED WITH OTHERS…
If you make these date pinwheel cookies, please snap a photo and share it, tagging me on INSTAGRAM so I can see. Truly nothing makes me happier than when I see others making and enjoying my recipes!
Also, don’t forget to pin this recipe for later and share it with your fellow cookie lovers.
And for more delicious recipes, be sure to follow me on PINTEREST and subscribe to my free newsletter here!
DATE PINWHEEL COOKIES
yields 36 COOKIES
SHOP THE POST
ITEMS + INGREDIENTS FEATURED IN/NEEDED FOR THIS RECIPE


